This determines the chain family and sharpening tools.
 Guide Matériel Jardin
WOOD CAME BEFORE THE JOB
A story that began
in the Vosges.
I was born in 1969 in Celles-sur-Plaine, a French mountain village where loggers were part of everyday life. Half my family worked in the woods; earlier generations brought timber down the mountains on wooden sleds called schlittes.
As a boy, I ate white sausages over the fire with my logger uncle. We heated our home entirely with firewood, and my father cut roughly 50 steres every year. Two decades as a landscaper and tree worker later added professional practice to what I had learned at home.
“I did not discover chainsaws in a product catalog.” — BEN
01
BEFORE SHARPENING
Start with a quality chain.
A cheap chain can lose its edge faster, stretch more and tolerate fewer sharpenings. First identify pitch, gauge and drive-link count. The round-file diameter must match the exact chain model—not merely the chainsaw or bar length.
It must exactly match the guide-bar groove.
Bars with the same advertised length may use different chains.
Ben's rule
Read the markings on the guide bar and chain before ordering. Manufacturer specifications always override general charts.
BEN'S HAND-FILING METHOD
Freehand,
but never random.
Three strokes are often enough for a routine touch-up. Dirt, stone or metal damage may require more work—or a grinder to restore equal cutter geometry.
COMMON FILING ANGLES
30° is common.
It is not universal.
Many modern chains use a 30-degree top-plate angle, but recommendations commonly range from about 25 to 35 degrees. Follow the cutter witness mark, chain package or manufacturer filing chart first.
25°— 30° —35°
Common range by chain profile
Some chains also require a specific downward filing angle.!
DEPTH GAUGES / RAKERS
Beginners: leave them alone.
The difference in height between cutter and depth gauge controls how much wood the tooth takes. Filing the rakers too low makes the chain grab aggressively, vibrate and increases kickback risk.
Large chips do not automatically mean a well-sharpened chain. They may mean dangerously low depth gauges.
- Never use an angle grinder on depth gauges.
- Use only a flat file with the gauge specified for the chain.
- Do not lower them automatically at every touch-up.
- When unsure, ask a qualified saw shop.
WATCH THE CHIPS
The saw tells you
what is happening.
A sharp chain makes clean, consistent chips without heavy pressure.
Fine sawdust instead of chipsThe cutters are dull or no longer biting correctly.
The saw pulls to one sideThe cutters are uneven in length or sharpness.
You must push hard to cutA sharp chain should feed itself into the wood.
Hot cut or smokeCheck sharpening, chain lubrication and tension.
Jerking and vibrationUneven filing, damaged chain or depth gauges filed too low.
THE BASIC TOOLKIT
A manual kit is enough.
This Oregon kit includes several round-file diameters, a flat file and basic maintenance tools. Always verify compatibility with your chain before filing.
Check the Oregon kit on Amazon →Affiliate link. Amazon OneLink may redirect you to your local store; check the seller, contents and current availability.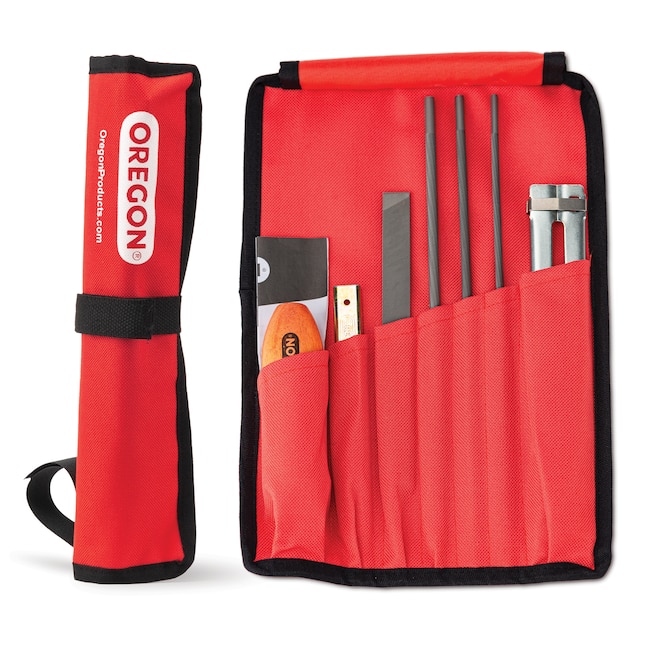
Technical references: Follow the exact filing chart supplied by your chain manufacturer. General values on this page do not replace the instructions for your chain.